Isolating Wild Yeast – Tips and Techniques
Many brewers swear by isolating wild yeast for homebrewing beer. Others are put off by yeast wrangling for a host of different reasons. This article will address one of the arguments many homebrewers put forward. Isolating wild yeast is too complicated. Yeast hunting does not have to be strenuous or overly technical. It all depends on how far you try to take the experiment! Below we will set out the various yeast wrangling strategies, starting with a simple approach that you can extend to a more advanced level.
How to Capture Wild Yeast for Brewing
The premise of yeast isolation is simple. You take a sample (fruit, vegetable, flower, or whatever you think is interesting) and encourage yeast to grow in something that resembles wort. Practically, this means that you can take some grapes, soft raspberries (or other ripe fruits), dunk them into a small sanitized vessel with sterile wort and incubate the resulting mix. If present, yeast that can grow in wort will do so, and when oxygen runs out, fermentation will start. You will pick up the tell-tale signs of fermentation when the vessel builds up pressure, and the liquid begins to give off the smell of alcohol (not all fermentations yield alcohol– some give rise to other products). Once you have caught yeast that you like, you can try to make starter cultures and use them for making beers. We always recommend using smaller batches first.
Techniques for Cultivating Wild Yeast
A slightly more technical approach uses a yeast isolation step designed to give you pure cultures. Here, the process is to take wild yeast suspensions (created as described above) and isolate individual yeast strains on agar plates. Once you have isolated such strains, you can identify them (using a microscope, for example), perform small scale test fermentations (not all yeasts are created equal) and produce starters with your elite wild yeasts! Below you will find some basic instructions and information on how to isolate your wild yeast for brewing beer.
Isolating Yeast for Homebrewing: Wrangling 101
The microbiological techniques discussed here aim to:
(i) separate microbes from each other to allow propagation of individual cells lines (strains).
(ii) Grow these cells to produce a colony. Colonies should, in principle, consist of genetically identical cells.
Malt Agar Media Recipe
There are plenty of media recipes out there. Some are well-defined and used for scientific research. For our purposes, however, a wort-derived recipe is just fine.
Ingredients (for 1 Litre of Media):
117g Dried Malt Extract (DME)
15g Agar
Malt agar plate preparation:
- Suspend and mix the DME into 1L of water (OG will be around 1.038).
- Heat the suspension and boil for ~30 mins.
- Add the agar to your boil, stir well and boil for another 15 minutes (make sure that the agar has dissolved)
- Cover the pot, and let it cool to about 55oC. Don’t use a chiller or cold water bath. It will locally cool the mix to the point that the agar hardens.
- Pour the mix into a petri dish. We recommend pouring until the liquid covers 2/3 of the bottom. The liquid will spread out to cover the entire plate (gently swirl/shake if needed)
- Cover the petri dish with the lid and let the plates cool down. Cooling typically takes ~20 minutes and should harden your media.
- Flip the plate (bottom-up) and open it slightly to let any condensation evaporate.
Yeast Isolation Instructions:
Once you have your plates and a liquid sample with wild yeast (as described above), you can start to isolate and grow your wild yeast.
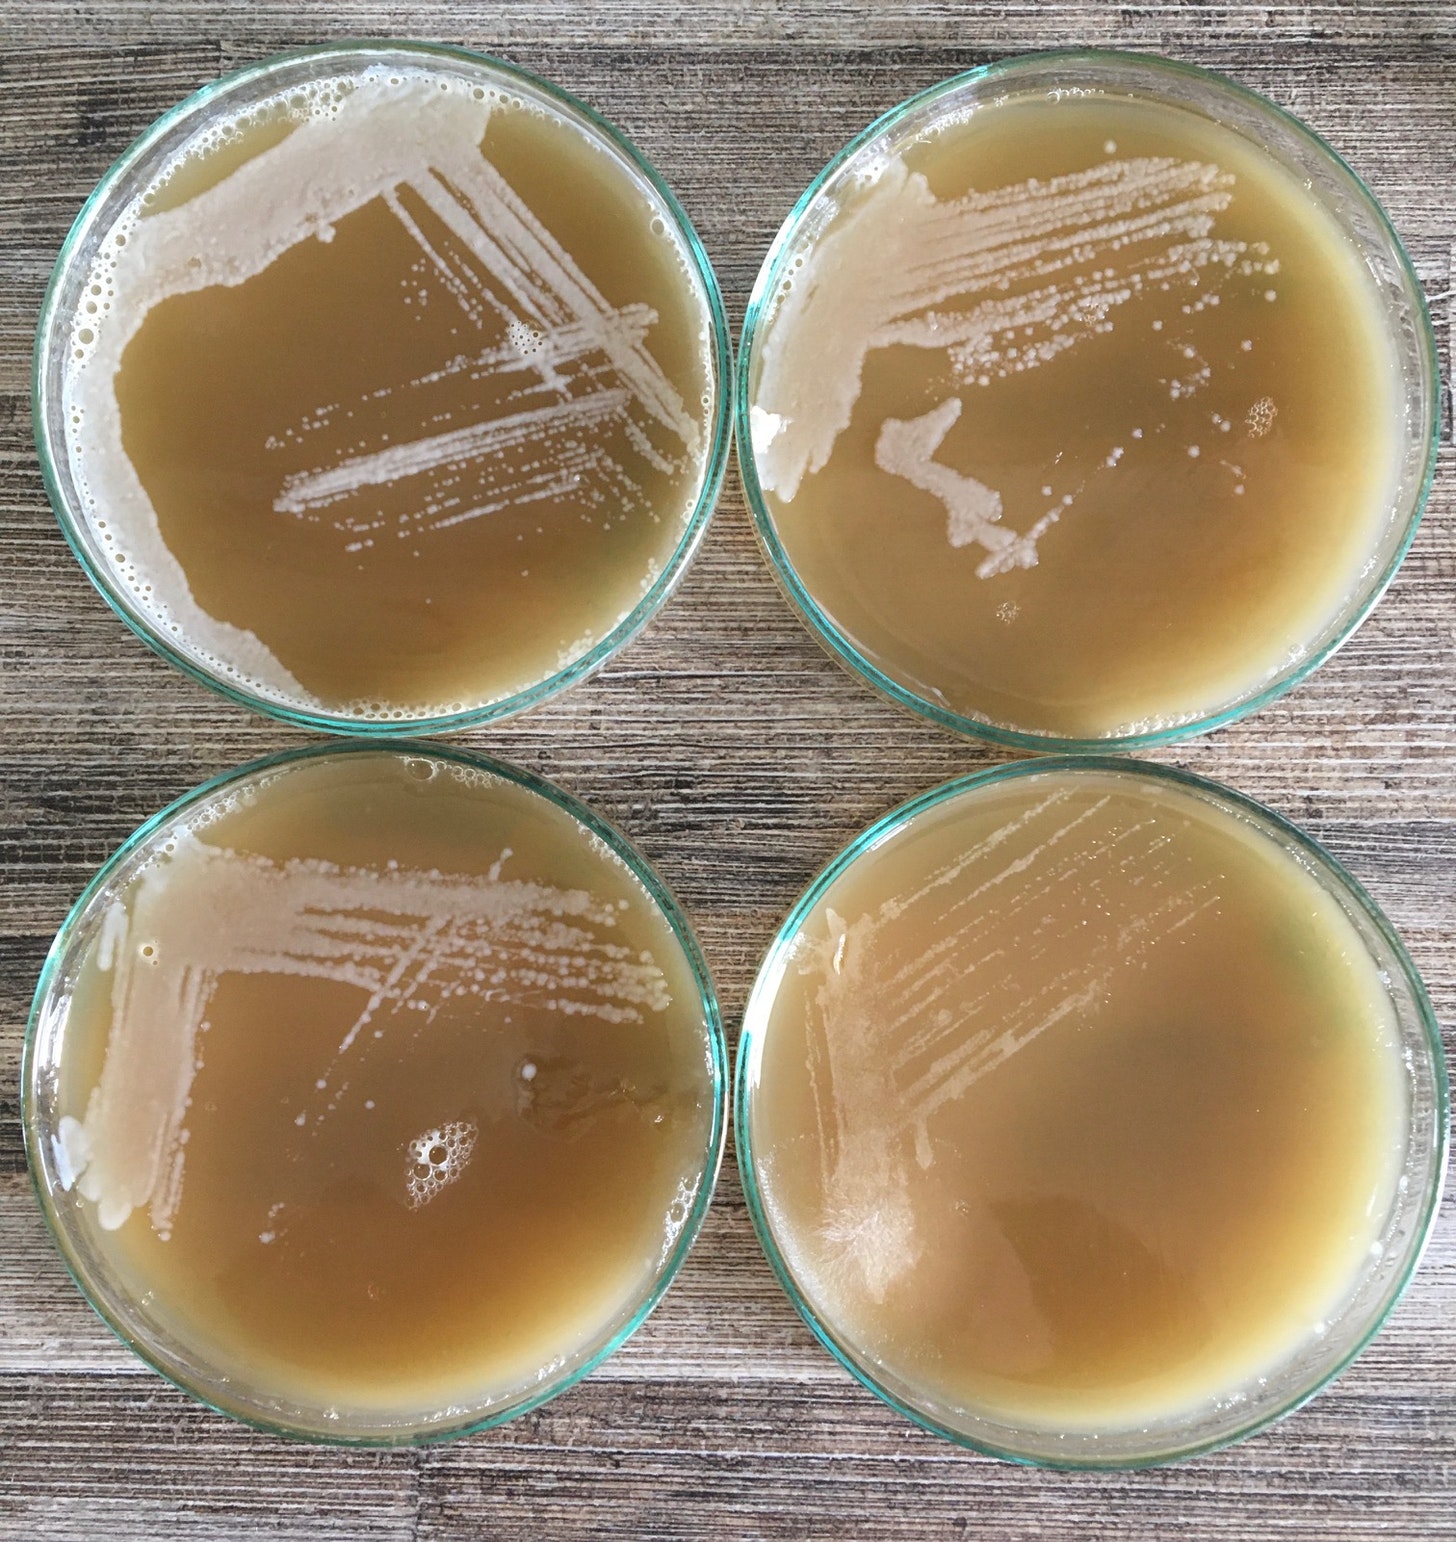
- To purify individual strains, take a sterilized straw or glass stick, dip it into the liquid and streak it across one section of your plate.
- Sterilize the straw or stick and streak the plate again, crossing the path of the previous streak.
- Repeat this three times (one plate per sample) and place the malt-agar plate at room temperature in the dark. Make sure to place the plate with the agar side up. Your yeast will grow onto the plates in lanes and individual dots (colonies) that you can pick to generate starter colonies.
- You can sample multiple colonies from each plate and grow them in small vessels (e.g. jam jars) to test for fermentation. You can use strains that appear to grow well and ferment sugars to alcohol for larger-scale fermentations and evaluation.
As you can see, isolating wild yeast for homebrewing beer is not overly complicated. Please give it a go! Petri dishes are pretty cheap, but applying these basic steps can yield some yeast strains whose attributes far outshine commercially available ones.
Brew on!
Get started and see for yourself
Here at BrewingBrowser, we want to eliminate any barriers that stop you from embarking on your brewer journey. If you need more information on isolating wild yeast for homebrewing beer or brewing in general, please check out our Homebrewing-101, Guide or homebrewing equipment sections on our site (brewingbrowser.com).
Visit our partners at The Beerologist to learn more about the science of brewing.
Image Attribution (Isolating Wild Yeast for Homebrewing)
Image provided by Edgar, The Beerologist
Great, thorough article. My only concern is accidentally breeding bad yeasts. Is it possible that a yeast could produce harmful compounds that I either can’t tell from my basic senses, or just don’t obviously smell bad? If so, is there any way to protect against accidentally using these for a brew?
Hi Jeremy. Many thanks for your kind comments. To answer your question, there are only a few ways with which you can find out whether your beer has any nasty compounds in them. Generally I would say though, that when you have reached a stage where you have a purified alcohol producing yeast strain, it would be very unlikely for it to produce harmful compounds. I think the risk comes with the introduction of bacteria. Consider however that even when you brew with commercial yeast strains, you have that same problem. Hygiene is key. I hope this answers your question.